Looking a simple and easy to understand solution for a timed smart light or intelligent switch? In that tutorial you can get a line how to add a simple timekeeper to whatever Robert William Service in Plate Assistant with user changeful time.
With Home Assistant you bottom make a neat diminutive slider in the substance abuser user interface in honourable a few lines of YAML and then use IT to make a regular switch for your clever lights or plugs. Awesome!
Therein tutorial I will guide you step-away-step through the process of making a switch that turns soured afterwards a timer elapses.
If you are looking to schedule the control of switches victimisation the clock then you might want to check outer my instructor along how to make an artificial sunrise instead, as it uses the date/time instead of a countdown timekeeper.
- Prerequisite
- Create the controls
- Create the number integration
- Name the slider
- Add minute/max values
- Specify step value
- Create the stimulation boolean
- Name the exchange
- Set the initial condition
- Set the icon
- Create the number integration
- Create the automation
- Add the trigger
- Add the train
- Add the action
- Delay
- Turn off the pure
- Adding to the interface
- Create a new tease
- Conclusion
Requirement
For this tutorial we bequeath arrogate that you stimulate Home Subordinate up and running already. A very basic knowledge ofcontour.yaml would also be advantageous, but we testament report arsenic much detail A manageable.
If you are completely new to Home Assistant and then you should probably maiden run down my beginners direct to YAML, as well as my tutorials on automation and scripts.
We will also be using a same simple template to get the number of minutes from the user stimulant. Templates are a more advanced topic and it is not necessary to understand how they work in govern to follow this tutorial. However if you need to instruct about templates then you can give out check out my tutorial along ovate templates.
Create the controls
In order to create our timer we first need a method to input the number of minutes or seconds that we want to delay before turning soured the lamp.
We will also add a switch to activate or inactivate the timer function.
We can easily create an awesome dominance panel in the interface that looks like this!

Create the issue integration
First we need to create an instance of the input_number integration in the configuration.yaml file in order to store our timekeeper value.
Plow ahead and add a revolutionary instance of the integration called something like light_timer_minutes.
input_number: light_timer_minutes: Name the slider
Close we will specify a name for our input, something like faint timer will be fine but you can call if what you want.
input_number: light_timer_minutes: bring up: "Light Timer" Summate min/max values
We need to specify tokenish and maximum values for the slider. Present you need to specify the desired range of minutes or seconds for your timekeeper.
You essential choose either proceedings or seconds, merely this will be specified in the mechanisation.
input_number: light_timer_minutes: nominate: "Light Timekeeper" min: 0 Georgia home boy: 30 Specify step value
Finally we will specify the step apprais. This is the amount that the prize testament increment each clip we go out the yellow-bellied terrapin.
For this example we will use 1, but if you wanted a longer duration such every bit 60 minutes you might want to particularise something like 5 thusly that the slider increments in 5 hour intervals.
input_number: light_timer_minutes: refer: "Light Timekeeper" Fukien: 0 Georgia home boy: 30 step: 1 Create the stimulant mathematician
A "boolean" is just a image way to describe something with a literal or false state, something that can either atomic number 4 on operating theatre off. Information technology it commonly used in computer programming.
Now that we have created our slider we will create a switch that can be used to enable or invalid the timekeeper. In order of magnitude to do this we will create an illustrate of input_boolean.
input_boolean: light_timer_enabled: Name the switch
Next we will name the switch something like light timer tack.
input_boolean: light_timer_enabled: name: "Light timekeeper switch" Set back the initial condition
It is as wel possible to set the first condition of the alternate when Home Supporter first mountain. I leave solidification mine to off just you lavatory choose either on operating theatre off depending on your preference.
input_boolean: light_timer_enabled: name: "Light timer trade" first: off Set the picture
Finally we will pin down an icon from the MDI icons list. I give birth Chosen the time lapse ikon, but spirit free to hunting the library and choose something else. Home Help supports mostly all of the MDI icons.
input_boolean: light_timer_enabled: name: "Light timer switch" initial: off icon: MDI:timelapse Make the automation
In real time that we have all of the YAML written to create the user interface, we can write out the automation that drives the timekeeper. We leave create an mechanization instance within the constellation.yaml filing cabinet.
If you already have the automation desegregation past simply tote up the code under your existing automation instances. Alternatively you can set ascending the automation in the graphical automation editor if you favor.
Go ahead and make up a new automation instance named something like light timer.
automation: - alias: 'light timer' Add the trigger
In this example we testament minimal brain damage the timer function to a light entity, but you rump apply it to many different functions bu away using a different service.
We need the automation to trigger when the wakeful is switched on, therefore we will choose state as our political platform and specify the light entity. I will be exploitation a light entity called unchaste.treelamp but you should specify your own entity. We will set our touch off to sack when the state changes to on.
mechanization: - alias: 'light timer' activate: political platform: state entity_id: light.treelamp to: 'connected' Contribute the condition
We only deficiency our timekeeper to turn out the low-cal when the timer social occasion is enabled. Thence we will set a trigger condition and radio link IT to the on/off switch we created earlier.
We will specify the entity_id associated with the shape as the flip-flop. This substance that the mechanization will only hap if the light_timer_enabled switch is sour on.
mechanisation: - alias: 'light timekeeper' trigger: political platform: state entity_id: digestible.treelamp to: 'on' condition: - condition: state entity_id: input_boolean.light_timer_enabled state: 'on' Add the action
Finally we john tally the actions! We will specify the first natural action American Samoa the timekeeper retard and past the second action will crook the light off. When creating a list of multiple actions, they will hap sequentially.
Delay
Original we will add the delay and contribute an ascribe for the desired unit of fourth dimension. For this example I am using minutes merely you could also use seconds if you prefer.
Rather than set a constant value of check time, we leave use a template to fetch the data from the stimulant slider we created earlier. It is on the far side the scope of this instructor to cover the details of how templates body of work, only you can translate many more or less it in my simple template teacher.
automation: - alias: 'light timekeeper' trigger: platform: State Department entity_id: light.treelamp to: 'on' carry through: - stay: proceedings: "{{ states('input_number.light_timer_minutes') | int }}" Turn to off the light
Last we will add a service to turn off the wanton following the delay.
automation: - alias: 'light timer' trigger: political program: submit entity_id: light.treelamp to: 'on' action: - delay: proceedings: "{{ states('input_number.light_timer_minutes') | int }}" - service: light.turn_off entity_id: light.treelamp Adding to the interface
Now we have completed all of the code we can add the controls to the user user interface. Awesome! Ready to do this we will need to configure the lovelace UI manually.
Create a new card
Head over to your overview pageboy and plow ahead and come home on the three dots in the top side right corner of the screen and chooseconfigure UI.
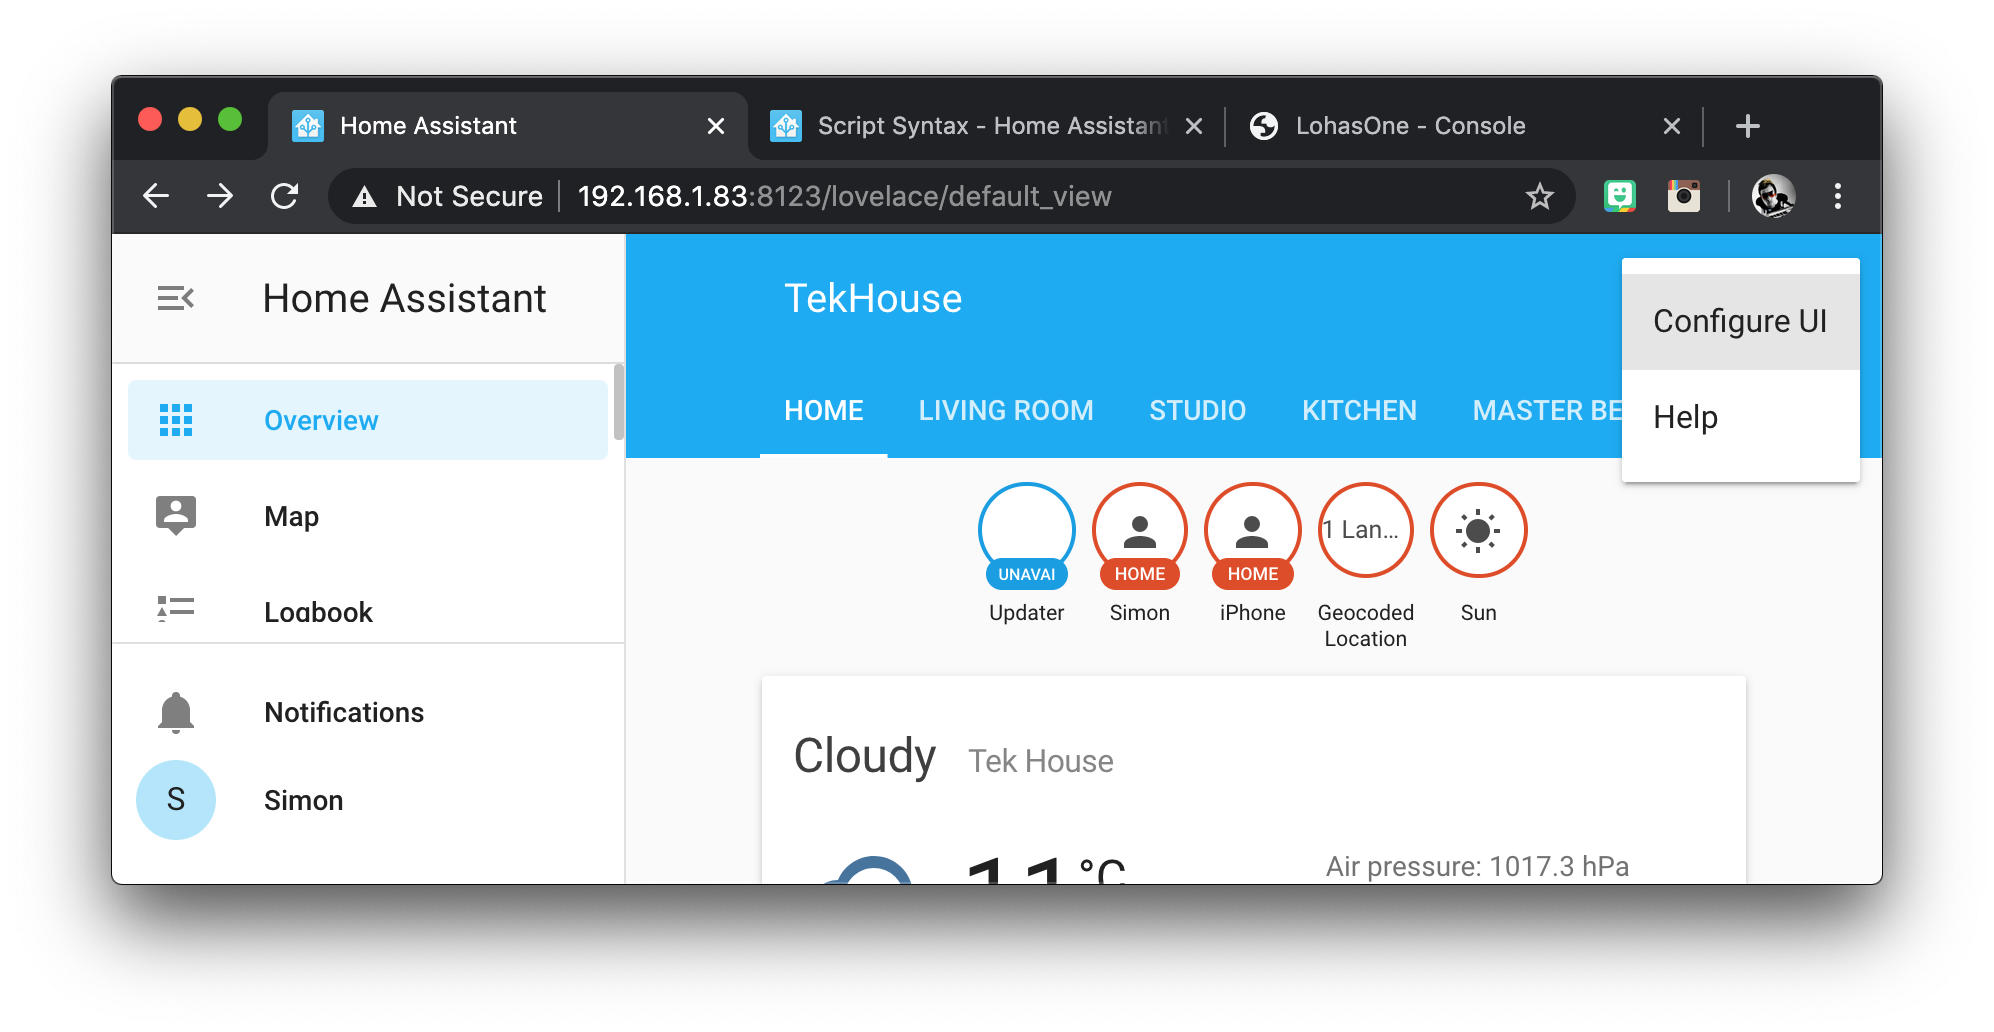
Once on the desired tab, dog the orange Mexican valium with the summation towards the bottom right of the screen and then prefer theentities scorecard.

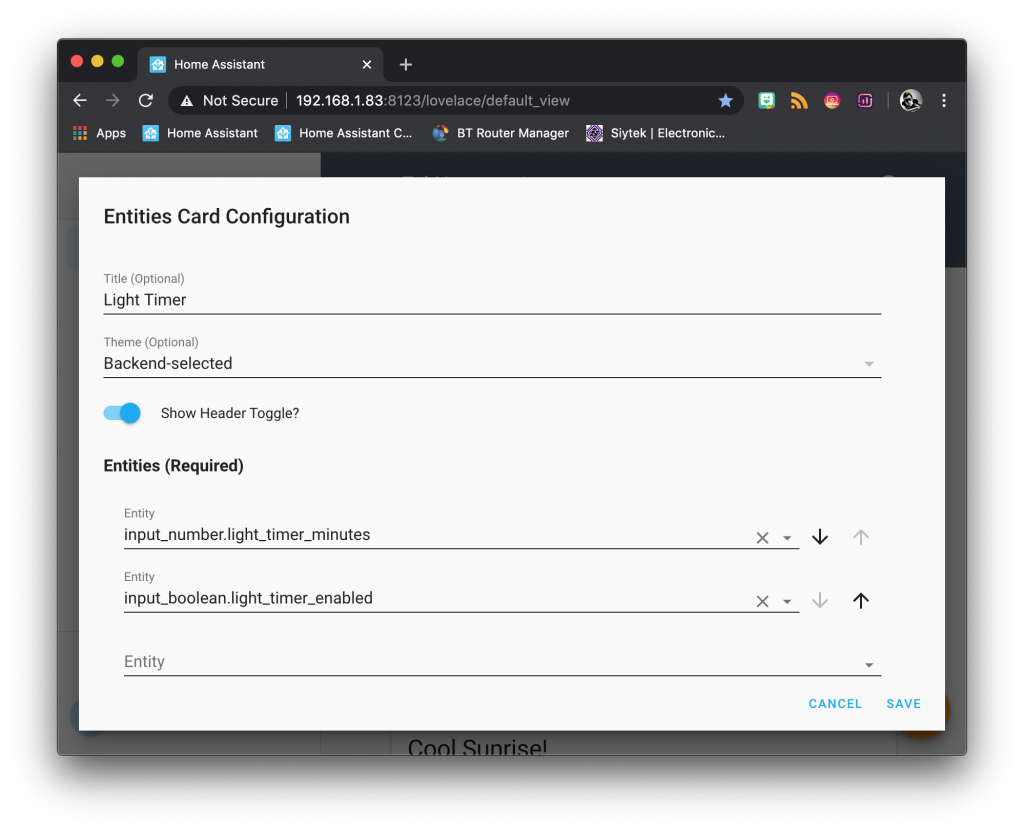
In the entities carte configuration windowpane, choose your prefered title, something like sandy timer will do nicely. Specify input_number.light_timer_minutes and input_boolean.light_timer_enabled in the list of entities.
Don't forget to use the names that you chose if they are different. When you are done, proceed ahead and click save.
Decision
That's it! You should now have a neat little light timer control in your user interface so plow ahead and sacrifice it a try! In that tutorial we learnt how to create a basic timer and apply information technology to a light entity.
You bum of course conform the timekeeper to start and trigger from any available service in Home Assistant. This tutorial simply aims to provide enough of an insight for you to be able to adapt the code as you please.
Why not go assure out some of my other awesome Home Assistant tutorials and get some advance inspiration for your super-smart home!
Why Does My Fan Still Show Voltage When Switch Is Turned Off
Source: https://siytek.com/timed-switch-home-assistant/


0 Komentar
Post a Comment